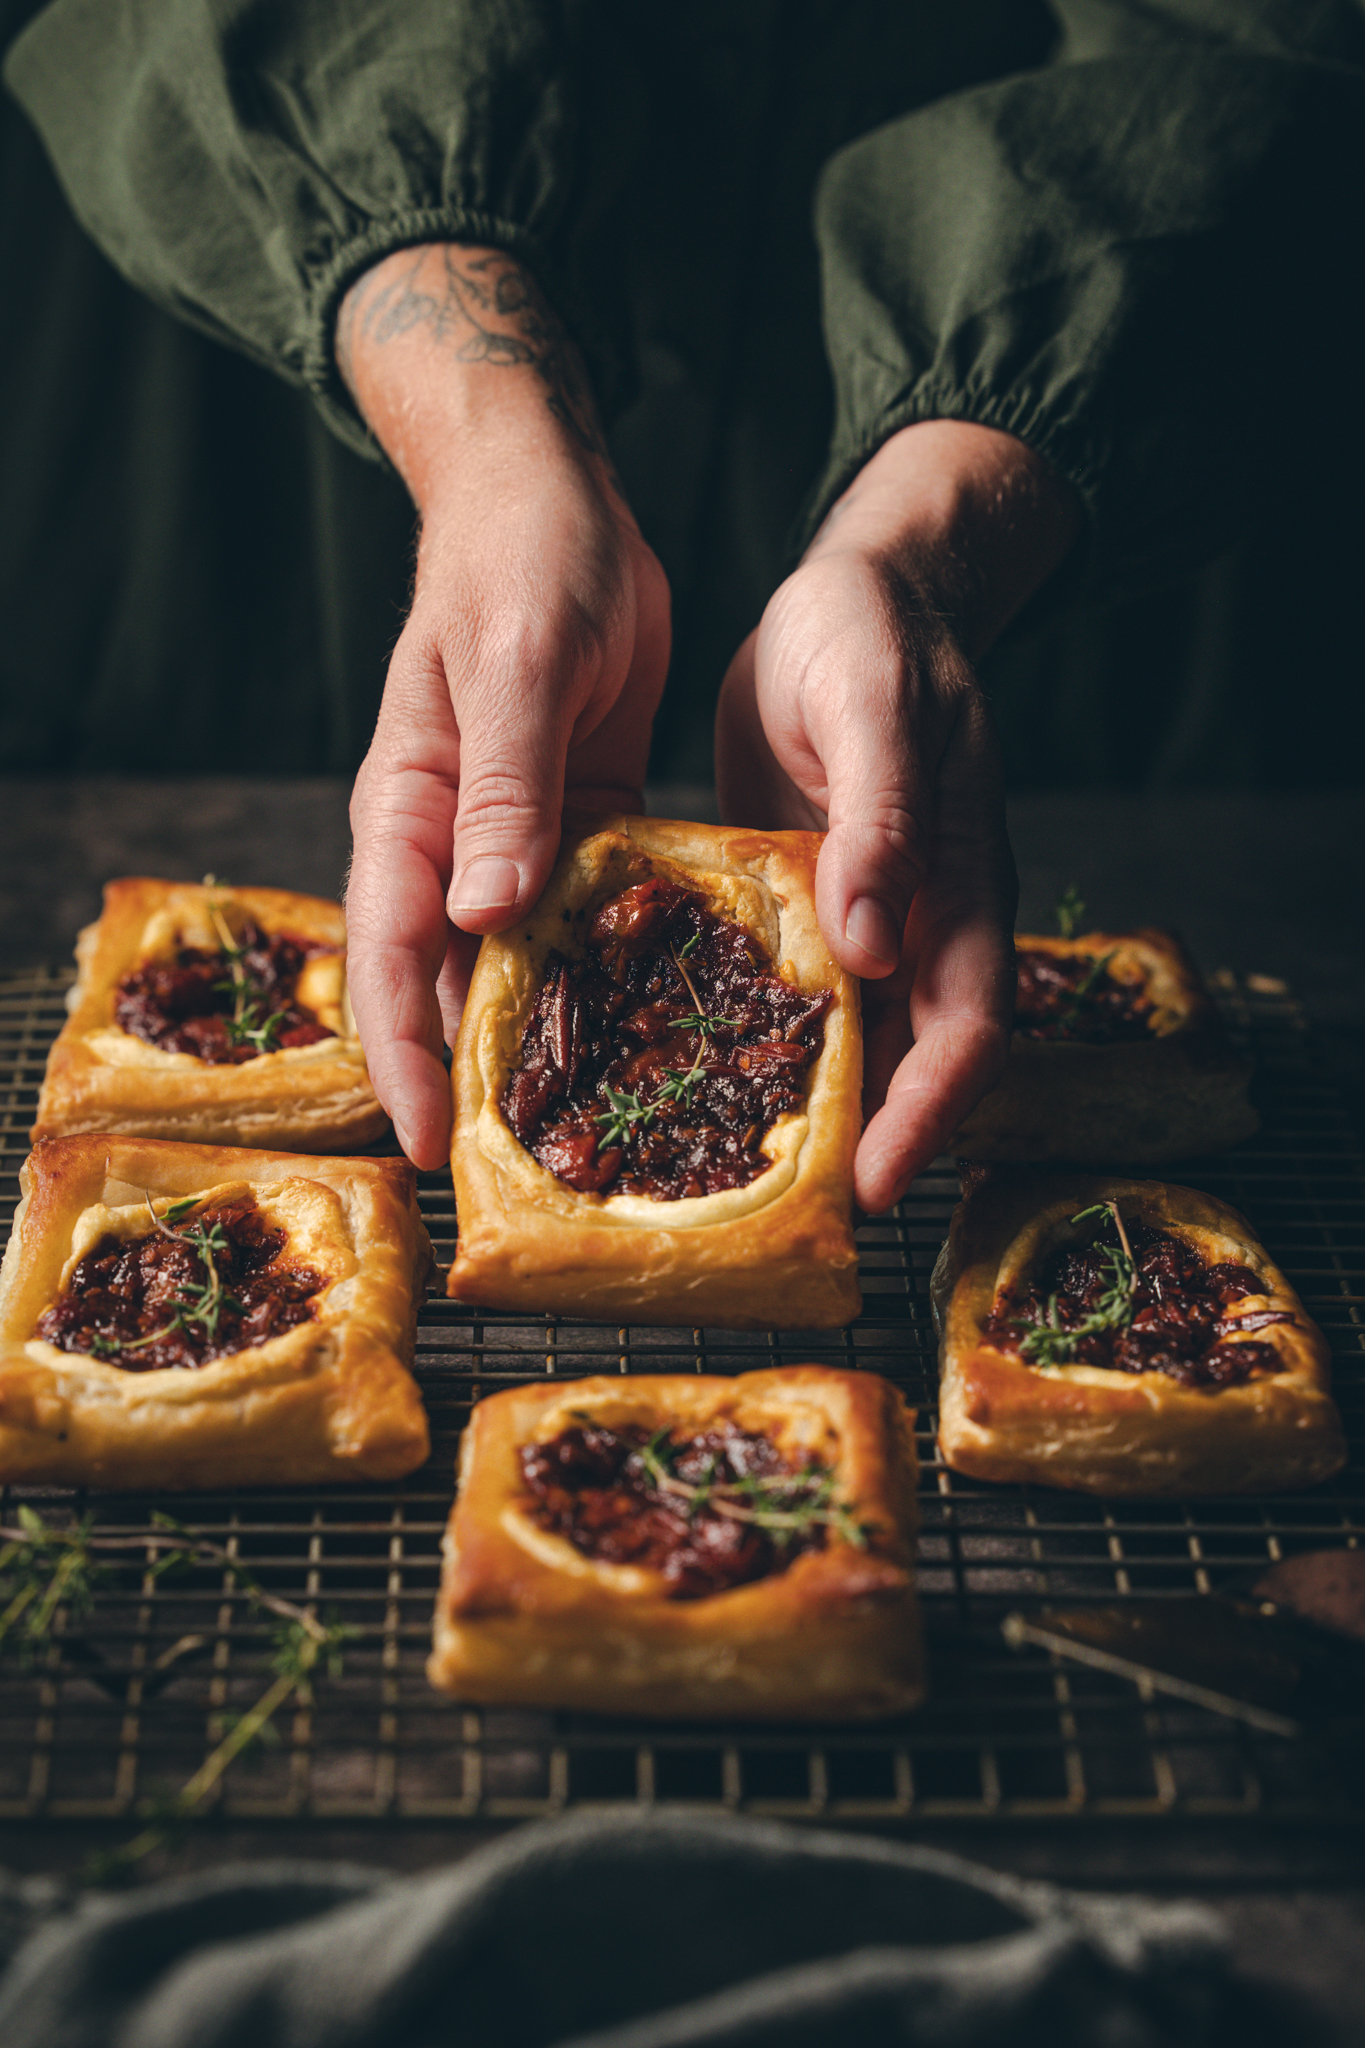
A late-summer experiment that got a little sticky… and a lot delicious.
I had no plans to make danishes that day.
I was standing in the kitchen, staring at the pile of cherry tomatoes on the counter that had started to feel more like an obligation than a blessing. My intentions had been good. I’d planted five tomato plants thinking they might give me a few handfuls a week — you know, something manageable. But here they were, multiplying faster than I could roast, sauté, or pawn off on friends.
I wasn’t in the mood for pasta. I didn’t feel like making sauce. And so, I found myself Googling tomato jam… and then, somehow, baking danishes. Because obviously, that’s the natural next step.
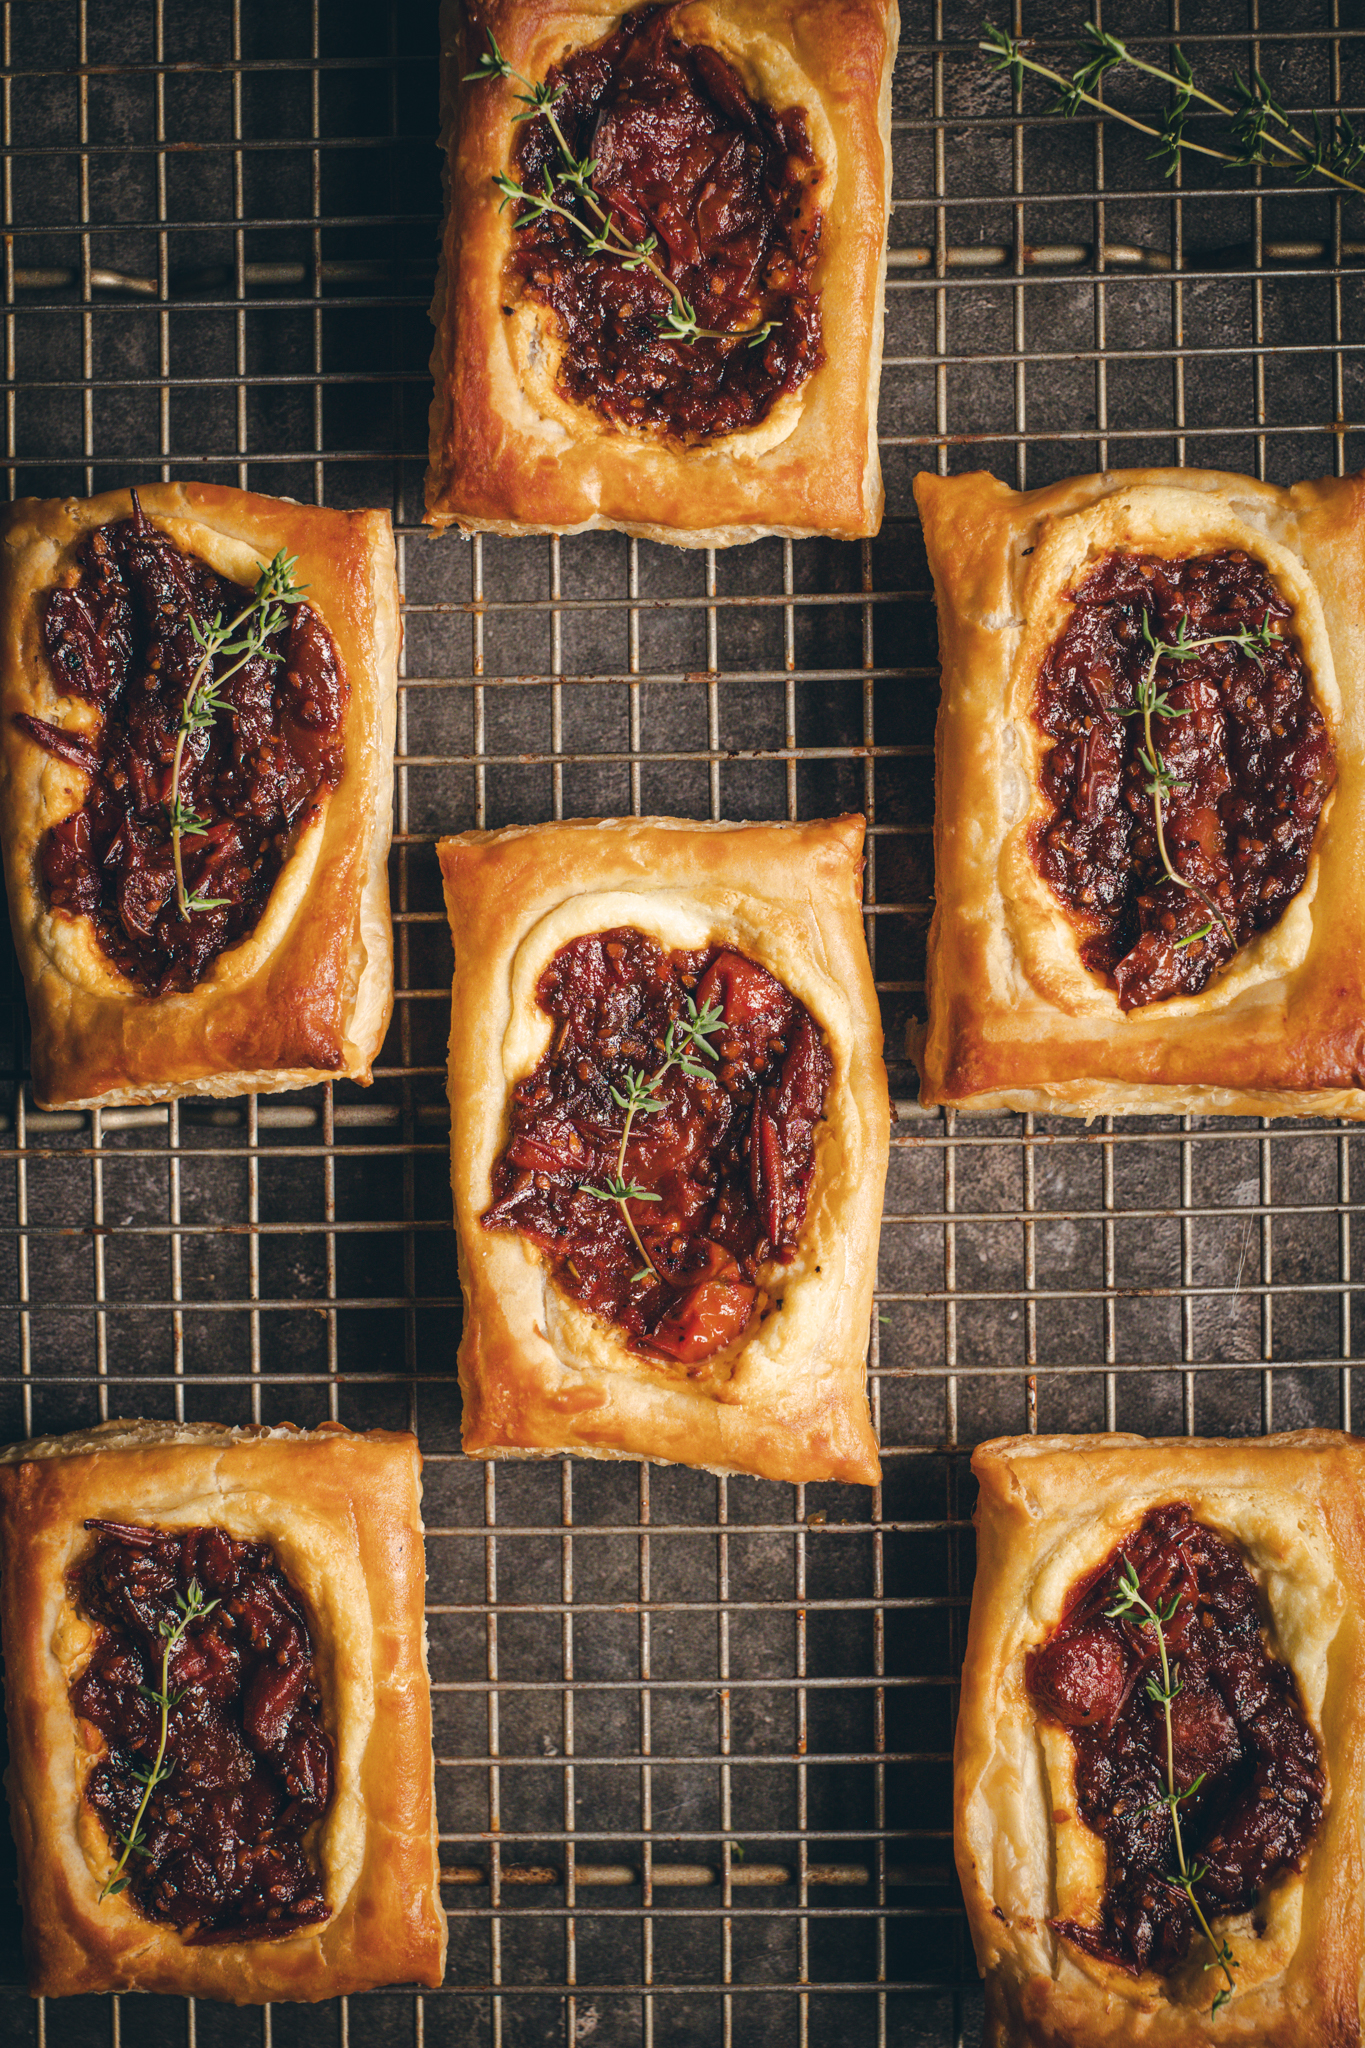
Let’s call this what it is: savory-ish pastry season.
We’re in that weird space between late summer and early fall — where it’s still hot enough for iced drinks and bare feet, but you’re already craving warm, golden things that smell like comfort.
This recipe landed right in the middle of that mood.
It’s got the rich, tangy brightness of summer tomatoes, the creaminess of goat cheese, the sweet-savory punch of herbs and balsamic, and all of it wrapped in buttery puff pastry that flakes just right when you break it apart with your fingers.
It feels indulgent, but not fussy. Comforting, but not boring.
And if you’re anything like me, this is exactly the kind of recipe that makes you want to stop everything and photograph it — because the textures just ask to be documented.
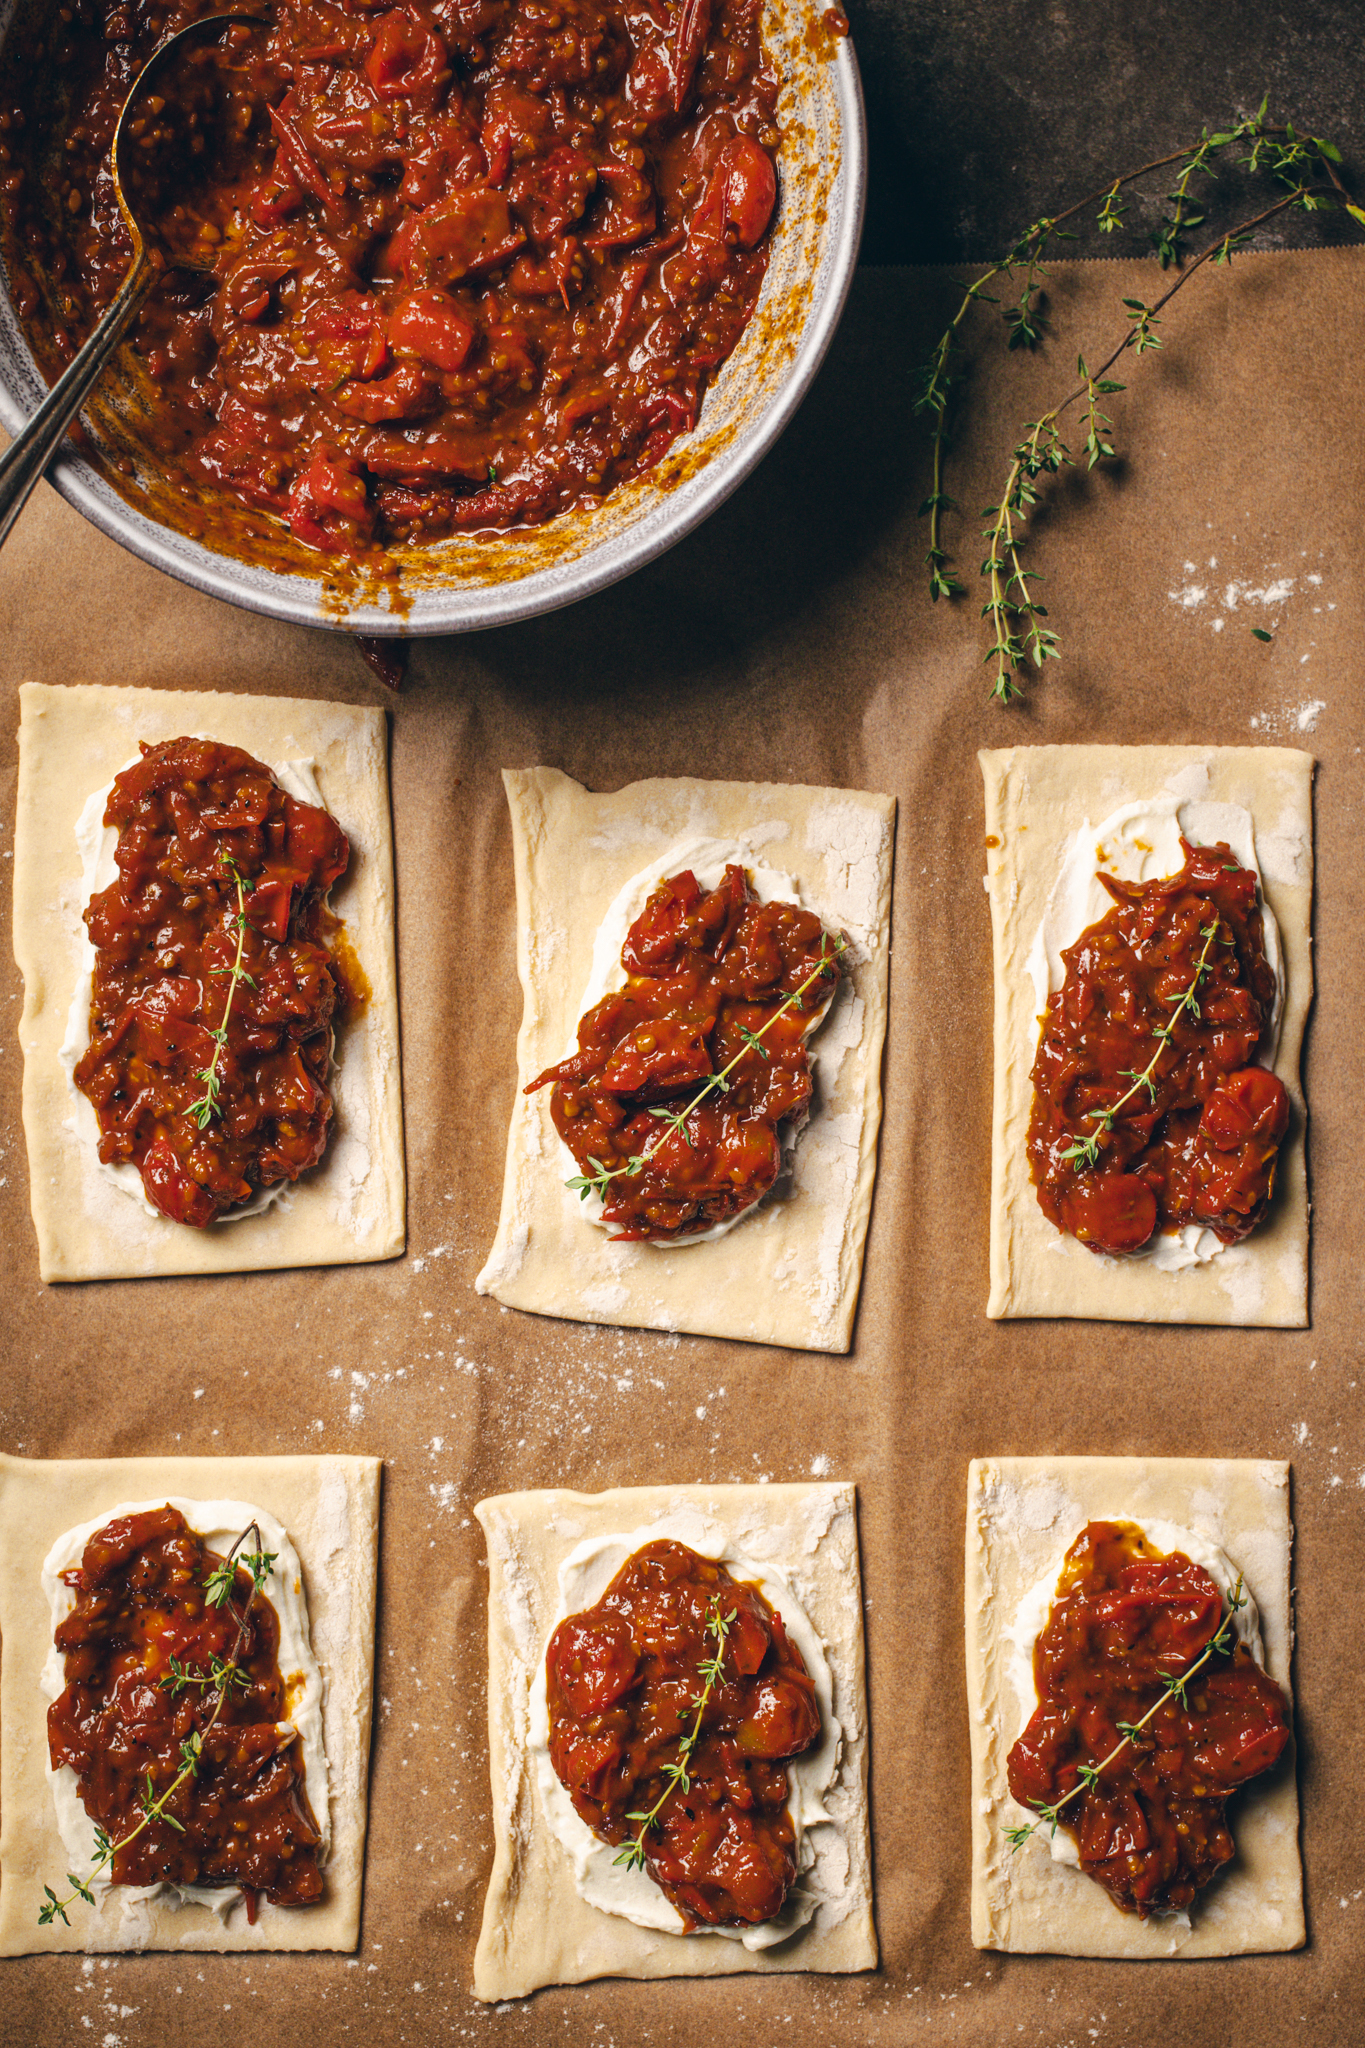
About the tomato jam (and its many lives)
This tomato jam came together out of necessity and mild overwhelm — I just needed a way to use up six overflowing cups of cherry tomatoes.
The base is simple: onions, garlic, herbs, a little sugar, and vinegar. But I made a few swaps as I went — lighter brown sugar instead of dark, a mix of balsamic and apple cider vinegar, and Herbes de Provence instead of thyme because that’s what I had. And you know what? It worked.
The Herbes de Provence gave it this soft floral quality that I loved — almost like the jam had a memory of lavender without being perfume-y. It balanced the tomato’s natural acidity, and the balsamic helped deepen everything into this jammy, savory-sweet mess that’s honestly incredible on everything from toast to eggs to sharp cheddar.
I did end up blending it just a bit — I like a smoother texture for pastries, especially when you’re layering it over something like whipped goat cheese. Too chunky and it starts to feel like salsa. A quick pulse with the immersion blender was all it took.
Also worth noting: I’d absolutely make a double batch of this jam and freeze the extra next time. It’s one of those things that makes simple food feel special.
The pastry situation
I tested two different store-bought puff pastries while putting this recipe together:
- Pepperidge Farm (the frozen kind, found near the pie crusts), and
- Jus-Rol (from the refrigerated section near the cookie dough).
The Pepperidge Farm was the clear winner here — thicker, easier to score and dock, and it held its shape better in the oven. Plus, one box comes with two sheets, which means you can get 12 danishes out of it without needing to double anything else.
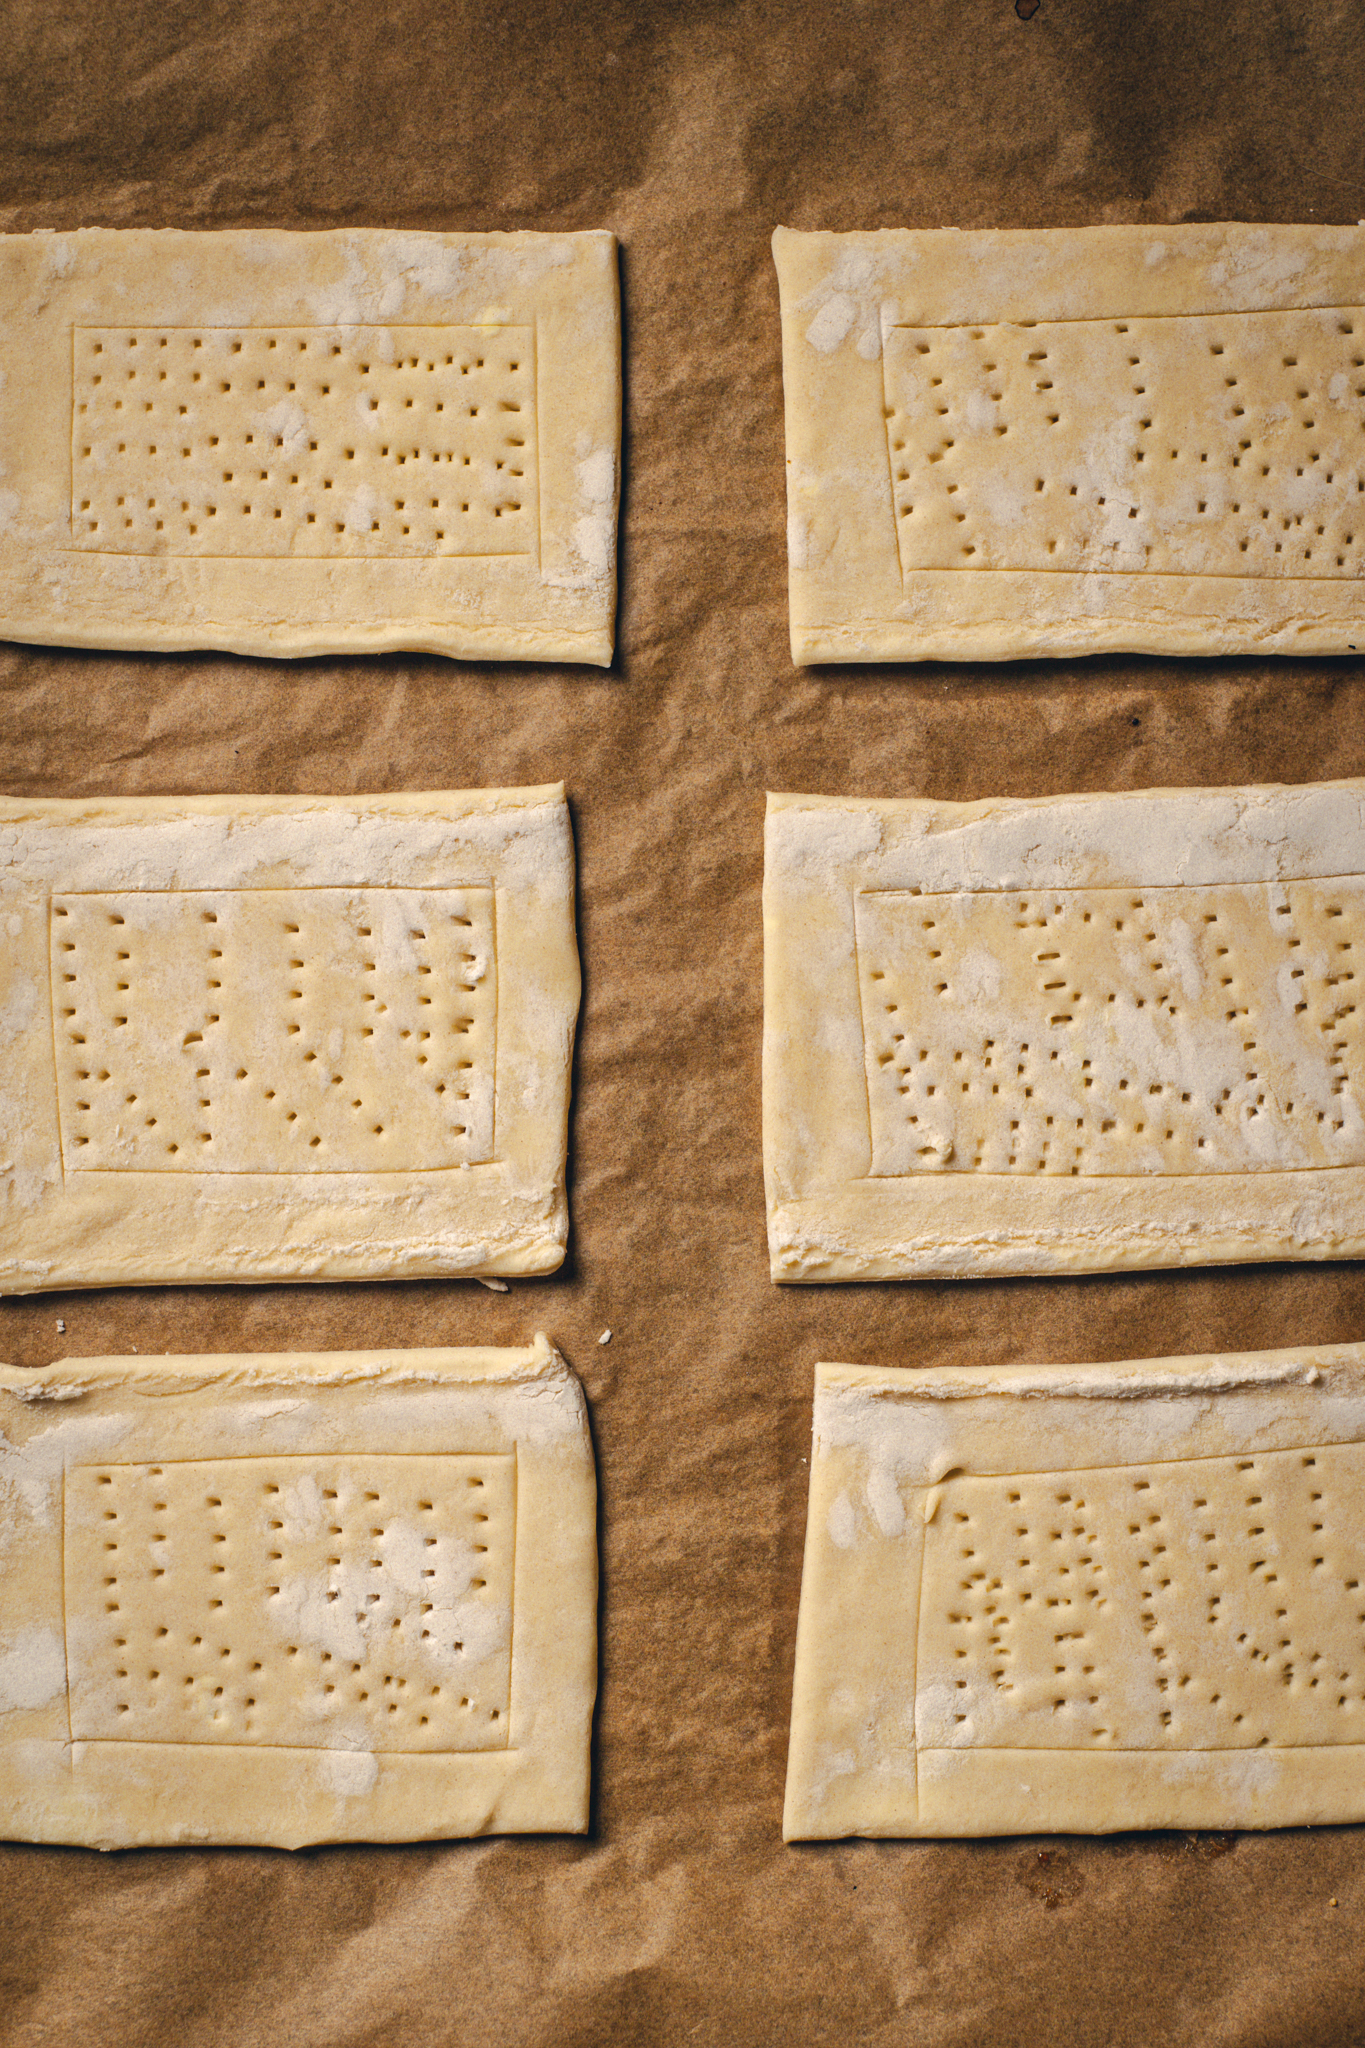
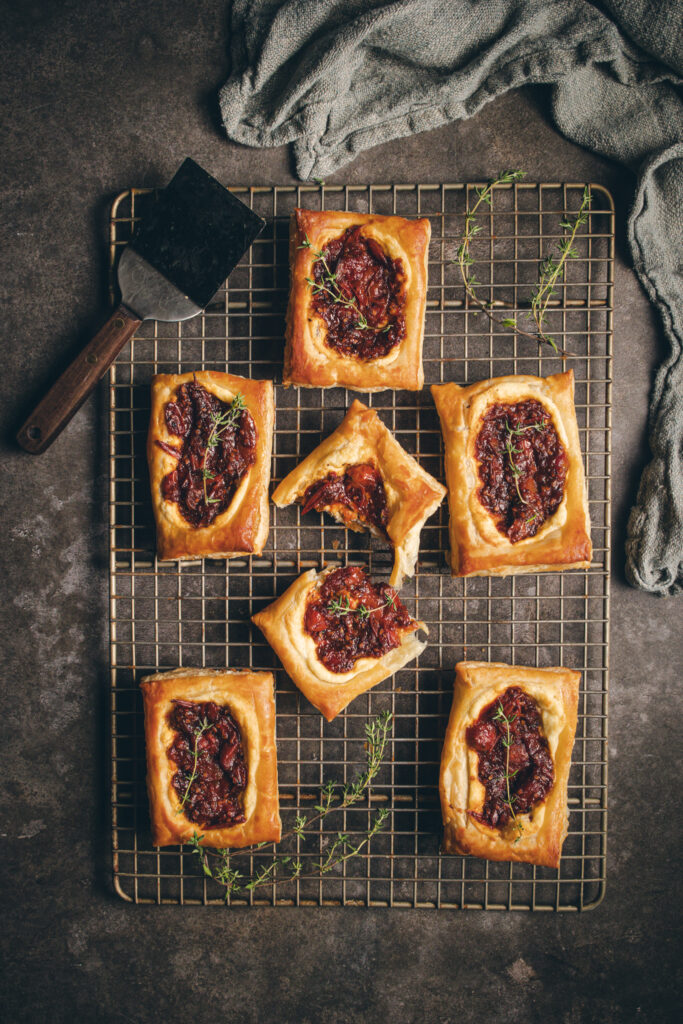
To get that classic bakery edge, I used the back of a butter knife to lightly trace a smaller rectangle inside each pastry square — not cutting all the way through, just creating a border. Then I used a fork to dock the center so it wouldn’t puff too high. It makes a big difference in the final shape, especially if you’re photographing them.
And don’t skip the egg wash. That little bit of gloss on the edges makes them look golden and finished, especially once you spoon the jam on top and it all glistens in the light.
About the filling (and how not to overdo it)
The whipped goat cheese is simple — goat cheese, a little cream cheese, a splash of cream, and maybe a touch of honey if you like a hint of sweetness. You don’t need much. I found that 1½ tablespoons of cheese and 2–3 tablespoons of jam was just right per danish. Any more and you risk overflow. Any less and it feels skimpy.
That said, even with those amounts, I still had some of both fillings left over — and I wasn’t mad about it. The leftover jam went on toast the next morning. The cheese became an impromptu dip for roasted carrots.
Real talk: I didn’t expect to love these as much as I did
They weren’t overly precious. They weren’t too sweet. They had just enough tang and herb to feel adult, but still familiar in that pastry-wrapped-comfort-food way.
And visually — they were just so satisfying. The way the jam bubbled in the oven. The way the goat cheese puffed ever so slightly at the edges. The golden flakes along the crust. I photographed them on a piece of parchment with a few tomato stems and a rustic knife, and it might be one of my favorite setups I’ve shot this month.
I didn’t even need to add extra styling. They just looked good on their own. Honest. A little wild. Like something you’d eat barefoot in a kitchen with the windows open.
A few tips if you try these Tomato Jam & Whipped Goat Cheese Danishes:
Use Pepperidge Farm pastry if you can. It’s more forgiving and yields 12 perfect rectangles.
Don’t skip scoring + docking. It’s the difference between elegant and exploded.
Go light on the sugar in the jam. I used 2 tablespoons instead of 4, and that’s plenty — especially with balsamic in the mix.
Blend the jam if it’s too chunky. A smooth finish pairs better with the goat cheese and gives a cleaner presentation.
Bake at 450°F. It might sound high, but it gives the puff pastry that crisp, golden flake without drying out the filling.
Plan for leftovers. The jam and cheese both keep well, and they’re the kind of leftovers you’ll be excited to find in the fridge.
Would I make these Tomato Jam & Whipped Goat Cheese Danishes again?
Absolutely.
In fact, I think they’d be perfect for a brunch spread or a casual appetizer — especially if you want to bring something that feels homemade without committing to hours of dough-making or fussy presentation.
They’re the kind of pastry you can make in your regular kitchen, on a regular Tuesday, with tomatoes you almost forgot to use.
And honestly, that’s the kind of recipe I’m after these days — the ones that don’t require an entire afternoon, but still feel like they gave you something back.
Not interested in Tomato Jam & Whipped Goat Cheese Danishes? Check out my Honey & Thyme Plum Danishes or my Whipped Honey Feta Peach Danish.
Tomato Jam & Whipped Goat Cheese Danishes
Equipment
- Dutch oven or large pot
- Cutting board
- Chef’s knife
- Measuring Cups
- Measuring Spoons
- Mixing Bowls
- Electric mixer or hand whisk
- Spatula
- Baking Sheet
- Parchment Paper
- Butter knife
- Fork
- Pastry Brush
- Cooling Rack
- Immersion Blender or Food Processor
Ingredients
Tomato Jam
- 2 tbsp olive oil
- 1 small onion diced
- 4 cloves garlic minced
- 2 tsp smoked paprika
- ¼ tsp crushed red pepper flakes
- 6 cups cherry tomatoes about 2 lbs / 928 g
- ½ cup water
- 2 tbsp apple cider vinegar
- 2 tbsp balsamic vinegar
- 2 tbsp light brown sugar packed
- 1 tsp Herbes de Provence
- 2 tsp kosher salt
- 1 tsp freshly ground black pepper
Whipped Goat Cheese
- 4 oz 115 g goat cheese, softened
- 2 oz 60 g cream cheese, softened
- 3 tbsp tbsp heavy cream or milk
- 1 tsp honey optional
- Pinch kosher salt
Other Ingredients
- 1 box Pepperidge Farm puff pastry 2 sheets, thawed
- 1 egg + 1 tbsp water for egg wash
- Fresh thyme or basil optional, for garnish
Instructions
For the Tomato Jam:
- Heat olive oil in a Dutch oven over medium heat. Add onion; cook 5 minutes, stirring occasionally, until softened.
- Stir in garlic, smoked paprika, red pepper flakes, and Herbes de Provence; cook 30 seconds until fragrant.
- Add tomatoes, water, vinegars, brown sugar, salt, and pepper. Bring to a boil, then reduce heat and simmer 25–35 minutes, stirring occasionally, until thick and jammy.
- For smoother texture, blend with an immersion blender (or pulse in a food processor) until desired consistency; optional: strain for extra-smooth jam.
- Cool slightly; store in jars in the fridge up to 2 weeks.
For the Whipped Goat Cheese:
- Beat goat cheese and cream cheese together until smooth and fluffy.
- Add cream gradually until soft and spreadable. Stir in honey (if using) and salt to taste.
Assemble and Bake:
- Prep pastry: Preheat oven to 450°F (230°C). Line a baking sheet with parchment. Unfold each puff pastry sheet and cut into 6 rectangles (12 total).
- Score pastry: Using a butter knife, trace a smaller rectangle inside each piece, leaving a ½-inch border. Don’t cut all the way through.
- Dock centers: Use a fork to prick the inside rectangle — this prevents the center from puffing too high and creates a well for the filling.
- Fill: Add about 1½ tbsp whipped goat cheese to the center of each pastry, followed by 2–3 tbsp tomato jam. (You’ll likely have some of each left over.)
- Egg wash edges: Beat 1 egg with 1 tbsp water; brush over pastry borders for a glossy finish.
- Bake: 20–25 minutes, until golden and puffed. Cool slightly; garnish with fresh herbs if desired.
Notes
- Puff pastry brand matters: Pepperidge Farm is thicker and holds its shape better than refrigerated brands like Jus-Rol for this recipe.
- Score + dock for best results: Lightly tracing a smaller rectangle and docking the center helps the filling stay in place and creates that bakery-style well.
- Don’t overfill: About 1½ tbsp whipped goat cheese + 2–3 tbsp jam per danish is ideal to avoid overflow.
- Jam sweetness: The recipe uses 2 tbsp brown sugar for balanced flavor. You can adjust up or down based on tomato sweetness.
- Texture control: For a smoother jam, blend with an immersion blender or food processor; strain if desired.
- Make-ahead: Both the jam and goat cheese can be made 2–3 days in advance and stored in the fridge.
- Serving ideas: These are great warm, at room temperature, or reheated briefly in the oven.
- Leftovers: Extra jam is excellent on toast, sandwiches, cheese boards, or with roasted meats.
Affiliate Information
As a part of the Amazon Affiliate program, I have the opportunity to share products and items that I genuinely find useful or interesting. When you come across links to these products on my blog, they're not just recommendations based on my personal experience or research; they also serve a dual purpose. If you decide to click on these links and make a purchase, I earn a small commission from Amazon at no additional cost to you.
This setup helps me to keep generating content that you find helpful and engaging, without bombarding you with irrelevant ads or sponsors. It's a win-win situation: you discover products that could add value to your life, and I get a little support to continue doing what I love. Rest assured, the integrity of my recommendations remains my top priority. I only share links to items that I believe in, and that I think could make a difference for you.
Thank you for your support and understanding. Your trust means the world to me, and I'm committed to maintaining transparency about how I fund my blog. If you have any questions about the Amazon Affiliate program or how it works, feel free to reach out.
©️ 2025 Austin Claire Photography | Template by Maya Palmer Designs | ©️ Photos by Austin Claire Photography| Privacy Policy | Terms
